لاہور (این این آئی) سابق اداکارہ زنیش خان نے ڈاکٹر ذاکر نائیک کی پاکستان آمد کے دوران پیش آنے والی مشکلات پر ان سے معافی مانگ لی۔ انہوں نے ایک ویڈیو پیغام میں وضاحت دی کہ جب ڈاکٹر ذاکر نائیک ملائیشیا سے پاکستان پہنچے، تو ان کے ساتھ تقریباً 1000 کلو اضافی سامان تھا۔ پی آئی اے کے کنٹری مینیجر نے انہیں اضافی سامان پر 50 فیصد رعایت کی پیشکش کی تھی، جسے ڈاکٹر نائیک نے قبول نہیں کیا۔ ان کا کہنا تھا کہ بھارت میں، غیر مسلموں کے لیے قوانین میں نرمی دیکھنے کو ملتی ہے، جہاں انہیں ہزاروں کلو سامان لے جانے کی اجازت دی جاتی ہے، مگر یہاں پاکستان میں مشکلات کا سامنا کرنا پڑا۔ زنیش خان نے اپنی پوسٹ میں کہا کہ ہمیں ہر چھوٹی بات پر شرمندہ ہونے کے بجائے اپنی قوم کی عزت کا خیال رکھنا چاہیے۔ یہ ہمارے لیے شرم کی بات ہے، اور انہوں نے ڈاکٹر نائیک سے دل سے معافی مانگی۔
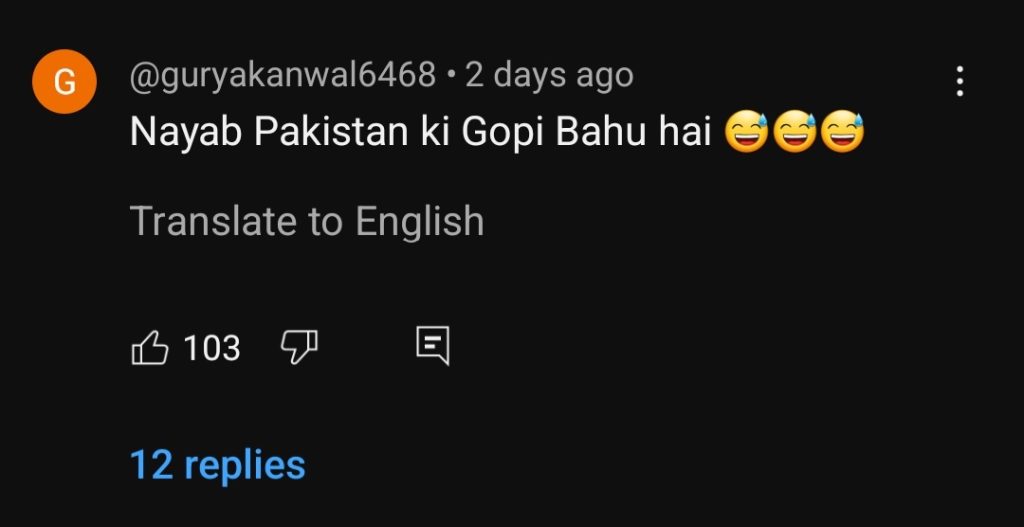
“Dil e Nadan,” a drama airing on Geo TV, features Mikaal Zulfiqar and Amar Khan in the main roles. The show has attracted considerable viewership, yet the reception of the lead female character, Nayab, has been mixed. Often, the formula of portraying innocent and naive female leads helps boost a show’s popularity. However, Nayab’s character, played by Amar Khan, seems to have been taken too far in this direction, leading to criticism for both its writing and portrayal.
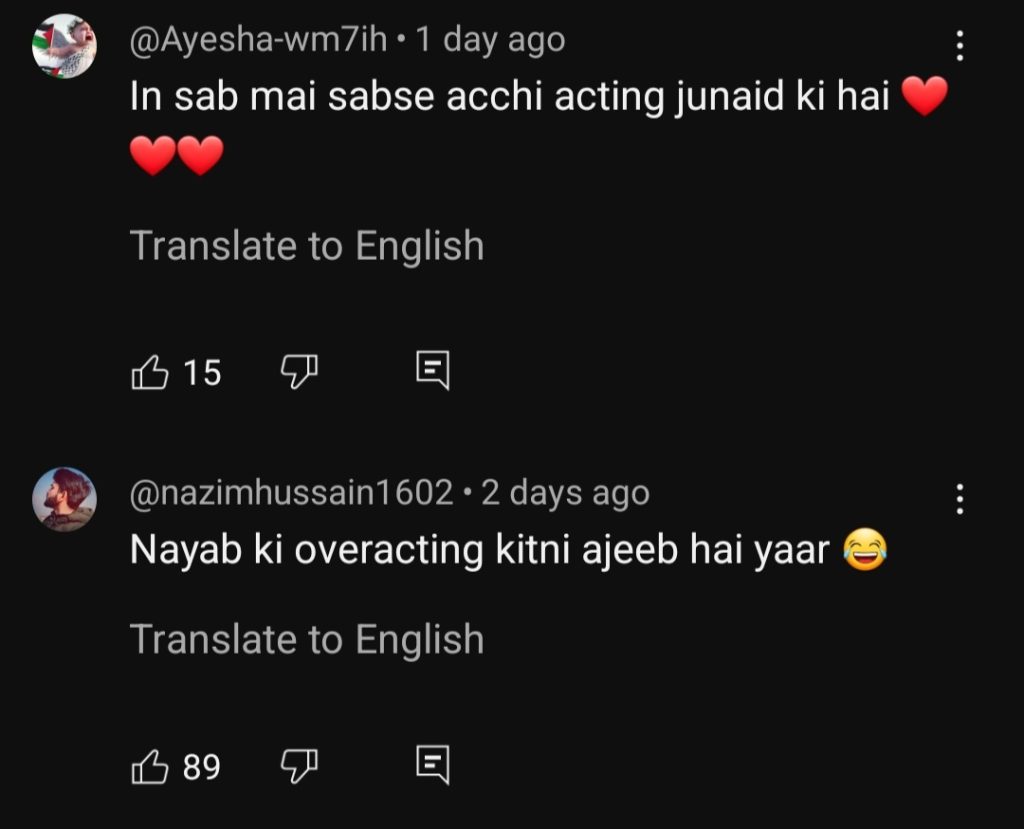
In Episode 17, Nayab, now married, has shown little to no character development. Her actions and demeanor remain largely unchanged from her earlier days as a student, which has not gone over well with fans. Many feel that Amar Khan’s portrayal lacks subtlety, with exaggerated expressions making the character come across as overly naive, to the point of appearing unintelligent.
Viewers, after watching 17 episodes, are hoping for some growth in Nayab’s character. The lack of change in her behavior continues to be a major point of contention among the audience, who have been vocal about their dissatisfaction.
I gave birth just five weeks ago, and adjusting to life with a newborn has been anything but easy. My husband suggested inviting his mom to help out, and I thought it might be a great idea at first. But things quickly turned sour. Instead of offering support, she practically moved in, making herself far too comfortable. She constantly had visitors over, leaving the house in a mess, while I was left to juggle feeding our baby, changing diapers, and cleaning up after everyone. I barely got any sleep, running on fumes, feeling like a guest in my own home.
Last night, everything came to a head. I was in the bedroom, feeding our son, and I could hear my husband and his mom laughing and watching TV downstairs. Once I put the baby down to sleep, I went downstairs, hoping to grab a bite to eat. What greeted me was a disaster — dirty dishes everywhere, takeout containers piled high, and not a scrap of food left in the fridge.
I asked, trying to keep my voice calm, “Was there any dinner left for me?” My mother-in-law shrugged and said, “Well, you didn’t come down, so we figured you weren’t hungry.” My husband, barely looking up from the TV, smirked and added, “Yeah, just clean up the mess when you’re done. It’s not like you’ve been doing much around here anyway.”
In that moment, something inside me snapped. Exhausted, feeling invisible, and now belittled in my own home, I realized I had to do something. I couldn’t keep letting them treat me like this. So, I went back upstairs and took a deep breath. Then an idea struck me — one that made me feel a little guilty at first, but I knew I had to follow through.
I grabbed my phone and called a locksmith, explaining the situation. The locksmith, perhaps sensing my desperation, agreed to come out immediately. While my husband and his mom stayed engrossed in their TV show, the locksmith arrived, and within minutes, the locks were changed. I went back inside and quietly packed up my mother-in-law’s things, leaving them in a neat pile outside the door.
When my husband and his mom finally realized what was happening, they rushed outside to find themselves locked out. My husband pounded on the door, shouting for me to let them in. But I calmly opened a window and looked him in the eye. “You said I don’t do much around here, right? So, you won’t miss me. Come back when you’re ready to treat me like a partner instead of a live-in maid.”
He stared at me in shock, but I closed the window and walked back to our baby, who was sleeping peacefully. For the first time in weeks, I felt a sense of relief. I knew I had to put myself and my child first, and I wasn’t about to let anyone make me feel small in my own home again. It was a hard decision, but I learned that sometimes, you have to stand up for yourself — even when it means taking a drastic step.
Now, my husband has been calling and texting, pleading to talk, but I’m taking my time to figure out what I truly want. I don’t know what the future holds, but I do know one thing: I won’t settle for being treated like an afterthought ever again.
A while back, Virat Kohli revealed in an interview that almond milk is a significant part of his diet because regular dairy, such as cow or buffalo milk, doesn’t align with his preferences. His focus on almond milk is due to its lighter nature, making it easier to digest while maintaining his body weight.
Kohli, who transitioned to a vegan lifestyle before 2018, has since changed his eating habits to stay fit and focused on his cricket and fitness goals. Earlier, Kohli wasn’t as conscious about his food choices, but in recent years, he has adopted a more disciplined and consistent approach to his health and fitness regime.
According to Indian media, Kohli now follows a specific meal plan, incorporating a variety of plant-based ingredients into his daily diet. His meals consist of seven essential items, including two cups of coffee, lentils, spinach, and various fresh vegetables. Notably, Kohli has completely eliminated sugar and gluten-containing foods from his diet, further ensuring that he stays at peak fitness levels for his cricket career.
Kohli’s remarkable fitness regime is widely known across the world of cricket, and he is often praised not just for his athletic prowess but also for his dedication to maintaining optimal fitness, even at the highest levels of competition. His shift to plant-based nutrition, combined with his consistent exercise routines, has become a key part of his success both on and off the field.
The much-awaited sequel to 2019’s Joker, titled Joker: Folie à Deux, is set to return to the big screen with a powerful lineup, featuring Academy Award-winning Joaquin Phoenix as Joker and multi-talented artist Lady Gaga portraying Harley Quinn. This film promises to delve deeper into the chaotic world of Gotham City, with an unexpected musical twist. With production wrapped and the first trailer released, fans are eagerly counting down the days. Here’s a comprehensive overview of what we know so far, from the release date to the plot and cast details.
Filming and Production Status
Filming for Joker: Folie à Deux concluded on April 5, 2023. Director Todd Phillips, who helmed the first Joker film, took to social media to share the news. In a heartfelt post, he expressed his gratitude to the cast and crew, particularly to Phoenix and Gaga. “That’s a wrap. Thanks to these two and the BEST crew the industry has to offer,” he said. Lady Gaga, who is set to play Harley Quinn, also marked the occasion by posting a photo of herself in character with the caption, “That’s a wrap X, Harleen.”
Fans got their first sneak peek of the chemistry between Phoenix’s Joker and Gaga’s Harley Quinn on Valentine’s Day 2023, when a striking image was shared by both the director and Gaga herself. The photo featured Harley cradling Joker’s face, the two appearing as though they had just shared a passionate kiss, setting the tone for their intense relationship in the upcoming film.
The film’s production officially kicked off on December 10, 2022, with Phillips sharing a behind-the-scenes image of Phoenix preparing for his role, adding excitement to the long-awaited sequel.
Release Date
Joker: Folie à Deux is slated for release on October 4, 2024. Although the original Joker was initially conceived as a standalone film, the critical and commercial success of the first movie paved the way for this sequel. After months of speculation, it was confirmed in June 2022 when Todd Phillips posted images of the script and Joaquin Phoenix reading it, officially signaling the start of this highly anticipated project.
The First Trailer
The first trailer for Joker: Folie à Deux was unveiled in July 2023, giving fans a glimpse into the movie’s dark and twisted world. The trailer highlighted some key moments, including a courtroom trial involving Arthur Fleck, as well as captivating scenes of Joker and Harley Quinn dancing and sharing intimate moments. The musical elements teased in the trailer stirred much curiosity, as this aspect marks a bold new direction for the film.
Cast and Characters
Joaquin Phoenix is back in his Oscar-winning role as Arthur Fleck, better known as Joker. This time, he’s joined by Lady Gaga, who plays Harley Quinn, Gotham City’s notorious femme fatale and Joker’s equally chaotic counterpart. Known for her dynamic performances in A Star is Born and House of Gucci, Gaga’s portrayal of Harley Quinn is expected to bring a fresh perspective to the character.
Zazie Beetz also returns as Sophie Dumond, Arthur’s former neighbor. Her character played a significant role in the first film as the object of Arthur’s delusional affections. Though her fate was ambiguous at the end of Joker, her reappearance adds to the intrigue of the sequel.
New faces joining the cast include Brendan Gleeson, Catherine Keener, Harry Lawtey, and Jacob Lofland, though their roles remain under wraps. Harry Lawtey, in particular, is reported to have a significant role in the film, according to sources like Deadline.
Todd Phillips will once again direct the film and has also co-written the script with Scott Silver. Bradley Cooper, who co-produced the first film, returns as a producer for the sequel.
Plot and What to Expect
Details about the plot of Joker: Folie à Deux have been kept tightly under wraps, but one thing has been confirmed—it’s a musical. This unexpected twist has generated both excitement and curiosity among fans. Composer Hildur Guðnadóttir, who won an Academy Award for her work on the first film, has hinted that the musical elements will serve a deeper narrative purpose, adding an emotional layer to the story.
The title Folie à Deux refers to a psychological phenomenon in which two people share the same delusion or mental illness, suggesting that the film will focus on the intense and destructive relationship between Joker and Harley Quinn. Fans are eager to see how their bond, marked by madness and mutual obsession, will play out on screen.
The film has received an R-rating due to “strong violence” and “brief full nudity,” ensuring that it will maintain the dark, gritty tone that made the first Joker so compelling.
Harley Quinn: Gaga vs. Margot Robbie
One question on many fans’ minds is how Lady Gaga’s portrayal of Harley Quinn will differ from Margot Robbie’s beloved version of the character, which was featured in Birds of Prey and The Suicide Squad. According to reports, Gaga’s Harley exists in a separate DC universe from Robbie’s, allowing both interpretations of the character to stand on their own.
Robbie herself has expressed enthusiasm for Gaga’s casting. During an interview with MTV in 2022, she said, “It’s such an honor to have built a foundation strong enough that Harley can now be one of those characters who other actors get to have a go at playing. And I think she’ll do something incredible with it.”
A Musical Twist
One of the most intriguing aspects of Joker: Folie à Deux is its musical format, a surprising departure from the original film’s realistic and somber tone. Fans and critics alike are curious to see how musical elements will be integrated into a story that’s known for its darkness and violence.
Composer Hildur Guðnadóttir has teased that the musical numbers will play a critical role in advancing the plot and deepening the emotional stakes of the film. While the concept may seem unconventional for a film like Joker, the decision reflects the filmmakers’ commitment to pushing creative boundaries.
Conclusion: A Sequel Worth the Wait
With Joker: Folie à Deux, director Todd Phillips is set to deliver a bold and innovative sequel that expands on the gritty, psychological depth of the first film. Featuring standout performances from Joaquin Phoenix and Lady Gaga, along with a surprising musical element, the film promises to be an unforgettable cinematic experience.
As the release date approaches, fans are eager to see how this unique blend of music, madness, and mayhem will unfold on the big screen. One thing is certain: Joker: Folie à Deux is poised to be one of the most talked-about films of 2024.
In a recently viral video, Dania Shah, former wife of the late televangelist Amir Liaquat, took to social media to clarify rumors surrounding her personal life and marriages. Dania has been in the public eye since her controversial marriage and subsequent fallout with Amir Liaquat. Her latest video comes in response to widespread rumors sparked by a video featuring her with a well-known TikToker, leading many to speculate that she had entered her third marriage.
However, Dania set the record straight. She explained that she is currently married to Shehzad, making it her second marriage after Amir Liaquat. She emphasized that the recent video with the TikToker was simply a social media collaboration and not a wedding announcement, as some had assumed. She made it clear that her personal life is often misunderstood and misrepresented in the public eye, urging people not to jump to conclusions based on her social media appearances.
Dania further mentioned that her first marriage with Amir Liaquat was a significant chapter in her life, but she has moved on and is now happily married to Shehzad. The viral video was purely entertainment-related, and any assumptions about her third marriage were entirely unfounded.
In closing, Dania Shah expressed her frustration with the constant scrutiny of her personal life and the rapid spread of rumors in the digital age, urging her followers to focus on facts rather than speculation.
1 gallon (3.78 liters) of milk (raw, low-temperature pasteurized, or non-homogenized milk; avoid ultra-pasteurized milk)
1 1/2 teaspoons citric acid mixed with 1/2 cup water
1/4 teaspoon rennet mixed with 4 tablespoons water
Cheese salt or sea salt (optional)
Instructions:
Dissolve the citric acid in water in a small bowl. In a separate bowl, dissolve the rennet in water. (If using lipase powder, dissolve it similarly in water.)
Pour the milk into a large pan at room temperature. Stir in the citric acid solution and, if using, the lipase mixture.
Heat the milk on medium until it reaches 95°F (35°C), then remove it from the heat. Stir in the rennet mixture for about 20 seconds. Cover and let it rest for 5-7 minutes to allow curd formation.
Once the curd is formed, use a knife to cut through it. Heat the mixture again to 105-110°F (40-43°C), gently stirring. Afterward, remove it from the heat and continue stirring for 1-2 minutes.
Using a spoon or spatula, transfer the curd to a strainer, separating it from the whey.
Place the curd in a bowl and press it with your hands to remove excess liquid. Set the whey aside in a jar for later use. If desired, add salt to the curd at this point.
Microwave the curd for 30 seconds until it reaches 145-155°F (63-68°C), then stretch and fold the curd with your hands until smooth. Alternatively, dip the curd into hot whey (155-165°F / 68-74°C) for about 20 seconds and stretch it.
Shape the curd into a ball by stretching and folding, pinching off sections to create smooth balls. Repeat the process with the remaining curd, reheating in the whey or microwave as needed.
Place the shaped cheese balls into room-temperature water for storage. Refrigerate until ready to use.
As Angelina Jolie and Brad Pitt continue their contentious divorce proceedings, their daughter Shiloh is reportedly distancing herself from her father by legally seeking to drop his last name.
The ongoing legal disputes between Jolie and Pitt have been marked by intense confrontations, particularly surrounding the sale of a French winery the couple co-owned. Recent court documents filed in Los Angeles in April included serious allegations against Pitt, which he has firmly denied.
This turbulent backdrop appears to be straining Pitt’s relationships with some of his children with Jolie. Earlier this week, Shiloh Jolie-Pitt celebrated her 18th birthday and has expressed a desire to be known simply as “Shiloh Jolie,” according to TMZ. Although the name change has not been legally finalized, Shiloh is hopeful it will be approved soon.
This move follows a similar action by her younger sister, 15-year-old Vivienne, who was credited as “Vivienne Jolie” in the Playbill for the new musical “The Outsiders,” which she helped produce alongside her mother. It remains uncertain if Vivienne has legally changed her name as well.
Shiloh and Vivienne are not the first of Jolie and Pitt’s children to alter their names. Their eldest daughter, Zahara, introduced herself as “Zahara Marley Jolie” in a video shared by Essence last November.
Recently, Jolie has accused Pitt of exerting “unrelenting efforts to control” her and attempting to “bleed her dry.” A source close to the situation suggested that despite these accusations, Pitt has provided significant financial support to Jolie, reportedly enriching her by nearly $100 million through loans, child support, and gifts.
Despite the lengthy and messy nature of their divorce, a resolution does not seem imminent.
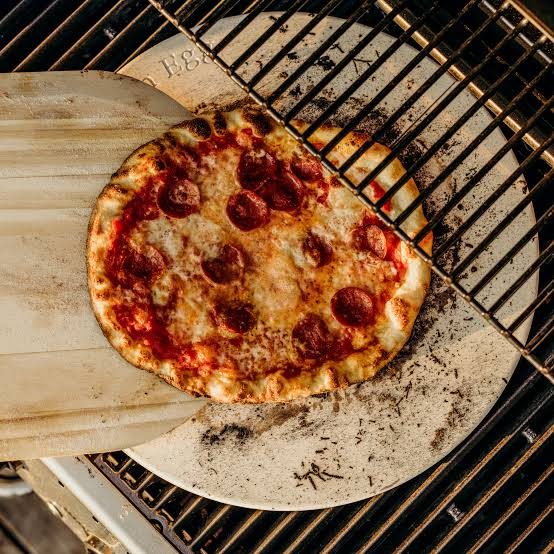
Elevate your pizza game by taking it to the grill. This method imparts a smoky flavor and crispy crust that’s hard to achieve in a regular oven. Here’s a step-by-step guide to mastering the art of grilled pizza, complete with pro tips and insights.
If making your own dough, opt for a thinner crust. It cooks faster and gets crispier on the grill.
Instructions:
Preheat the Grill: Set your grill to medium heat. If using charcoal, let the coals turn gray and spread them evenly.
Roll Out the Dough: On a floured surface, roll out your pizza dough to your desired thickness. Remember, thinner crusts work best for grilling.
First Grill: Brush one side of the pizza dough with olive oil. Once the grill is hot, place the dough oiled-side-down on the grill. Cook for 2-3 minutes or until you see grill marks and the dough is puffy.
Prep for Toppings: Remove the dough from the grill and place it grilled-side-up on a tray. This side will receive the toppings.
Add Toppings: Brush the grilled side with a bit of olive oil and then apply your sauce, cheese, and desired toppings. Remember, less is more when it comes to toppings on grilled pizza. Overloading can result in a soggy middle.
Second Grill: Return the topped pizza to the grill, uncooked side down. Close the grill lid and cook for 5-7 minutes, or until the bottom is crispy and the cheese is melted.
Serve: Remove from the grill, slice, and enjoy!
Pro Tip 2:
Using a pizza stone on the grill can help achieve an evenly cooked crust and prevent the dough from falling through the grill grates.
Nutritional Information:
Varies based on toppings and dough used.
Pro Tip 3:
Consider unconventional toppings that pair well with the smoky flavor from the grill, such as peaches, prosciutto, or even BBQ chicken.
Grilled pizza is a summertime favorite, offering a unique twist on traditional oven-baked varieties. With its smoky undertones and crisp crust, it’s a must-try for every pizza aficionado.
Chimichurri, traditionally an Argentinian green sauce, is celebrated for its herby, tangy, and slightly spicy flavor profile. Its vibrant taste effortlessly elevates any dish, and when paired with the wholesome, nutty charm of chickpeas, the result is nothing short of a culinary masterpiece. Chimichurri Chickpeas not only offer a rich taste experience but also pack a hearty nutritional punch. Journey with us as we delve into the crafting of this flavorful fusion, augmented with pro tips and nutritional insights.
Ingredients:
For the Chimichurri Sauce:
Fresh Parsley (1 cup, finely chopped): The foundational herb of chimichurri.
Garlic Cloves (4, minced): Introducing a robust aromatic essence.
Red Wine Vinegar (1/4 cup): The tang that balances the herbs.
Olive Oil (1/2 cup): Gives a silky texture to the sauce.
Red Chili Flakes (1 teaspoon): For a hint of heat.
Dried Oregano (1 teaspoon): Enhances the herbaceousness.
Salt & Pepper (to taste): The quintessential seasoning duo.
For the Chickpeas:
Chickpeas (2 cups, cooked or canned): The protein-packed star of the show.
Olive Oil (2 tablespoons): For crisping up the chickpeas.
Salt (to taste): Elevating the natural flavor of chickpeas.
Pro Tip 1:
To allow the flavors to meld beautifully, prepare the chimichurri sauce ahead of time, ideally letting it rest for a few hours before use.
Instructions:
Crafting the Chimichurri Sauce:
Blend of Flavors: In a mixing bowl, combine parsley, cilantro, garlic, red wine vinegar, olive oil, chili flakes, oregano, salt, and pepper. Stir until it forms a cohesive sauce.
Resting Phase: Allow the chimichurri to sit, letting the flavors fuse together.
Chimichurri Meets Chickpeas:
Golden Chickpeas: In a skillet over medium heat, warm the olive oil. Add chickpeas and a pinch of salt, sautéing until they turn golden and slightly crunchy.
Flavor Fusion: Lower the heat. Drizzle a generous amount of chimichurri sauce over the chickpeas, ensuring they’re well-coated. Stir and let the flavors marry for a couple of minutes.
Pro Tip 2:
For a more pronounced chimichurri flavor, allow the chickpeas to marinate in the sauce for a few hours before serving.
Nutritional Information:
Per serving:
Calories: 305
Total Fat: 20g
Saturated Fat: 2.5g
Cholesterol: 0mg
Sodium: 300mg
Total Carbohydrates: 24g
Dietary Fiber: 6g
Sugars: 4g
Protein: 8g
Vitamin C: 25% DV (Daily Value)
Iron: 12% DV
Pro Tip 3:
Chimichurri Chickpeas make a delightful addition to salads, wraps, or as a side dish. They can also be paired with grilled vegetables or meats to create a balanced meal.
In the realm of culinary fusions, Chimichurri Chickpeas stand out as a delightful amalgamation of South American zest and Middle Eastern earthiness. Each spoonful is a testament to the versatility of simple ingredients, and how, when paired right, they can lead to a dish that’s flavorful, nutritious, and unforgettable.
2 thoughts on “Chimichurri Chickpeas: A Savory Symphony of Flavors”
I’m really impressed with your writing abilities as smartly as with
the structure for your weblog. Is that this a
paid topic or did you modify it your self? Either way keep up the nice quality writing,
it is uncommon to see a great blog like this one nowadays..


Peculiar article, just what I wanted to find.